How to Draw Straight Line in Krita
Krita tutorials: Learn the basics of the digital art software
Welcome to our Krita tutorials. Krita is one of the best free painting programs available and includes a great variety of tools and features. While Photoshop has features that can be useful from painting to photo retouching to photo manipulation, too many options create a tough learning curve for a digital painter.
Krita keeps its interface painter friendly with a clean style and minimal distractions. Tools are accessibly placed, and most of the window is dedicated to the canvas. Since Krita has such a gentle learning curve, it's easy – and important – to familiarise yourself with its features before diving into the painting process. So we've put together a series of tips to get your started. It's definitely worth it as the program is so good it made it into our pick of the best software for digital artists.
Stick with this page for a tutorial on finding your way around the interface, or skip to page two for a step-by-step guide on how to tidy your sketches using Krita.
If you want to improve your drawing skills, head over to our post on how to draw – a roundup of the best drawing tutorials out there.
- Download Krita
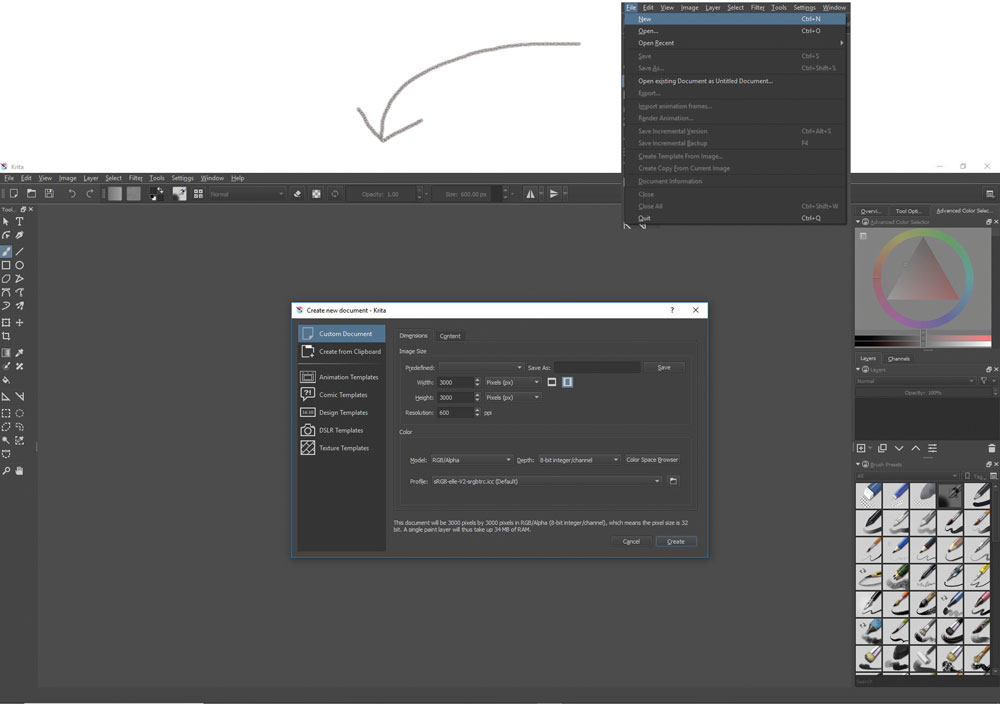
01. Create a new document
(Image: © Sara Tepes)
Open up a new document by going to File>New. To control the size of the canvas, you can select from one of the templates in the Predefined drop-down menu, or either change the dimensions yourself. Choose either pixels or inches for your dimensions and set the canvas size to the ratio you want. I prefer a larger file size, no smaller than 3,000px on the shortest size but no larger than 7,000px on the longest. Finally, set your Resolution either to 300 or 600; the higher resolution, the greater quality for the final image.
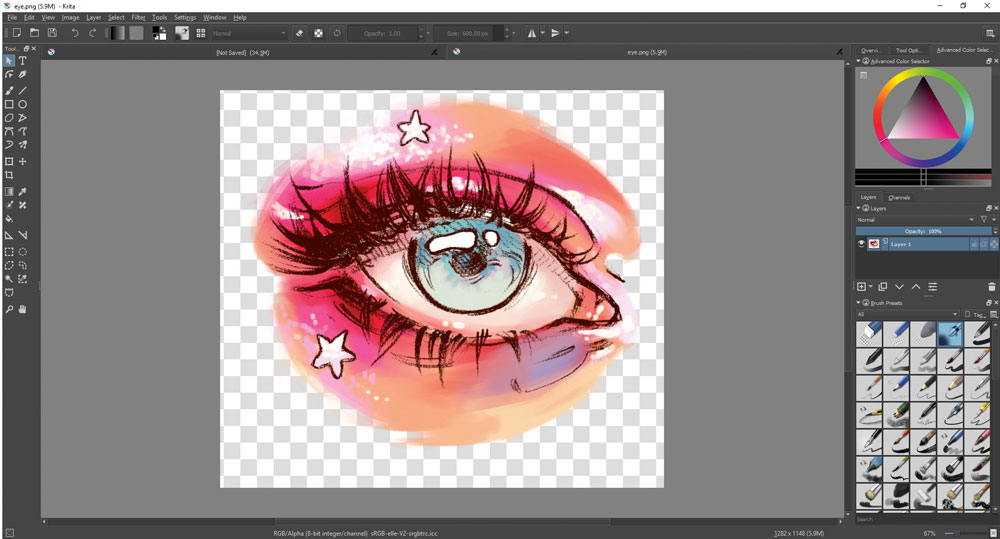
02. Become familiar with the left Toolbar
(Image: © Sara Tepes)
On the left-hand side is the Toolbar. I'll be pointing out some of the tools you're likely to use the most. The Freehand Brush tool is what you're going to be doing all your painting and drawing with. Underneath that, the Transform tool is a handy feature for selecting and changing the size or shape of a section. The Gradient tool and Fill tool are useful for filling in large sections with colour, and the Color Selector tool is necessary for blending when painting. The Outline Selection tool make selecting a specific part of your piece easy, and is often used in conjunction with the Transform tool.
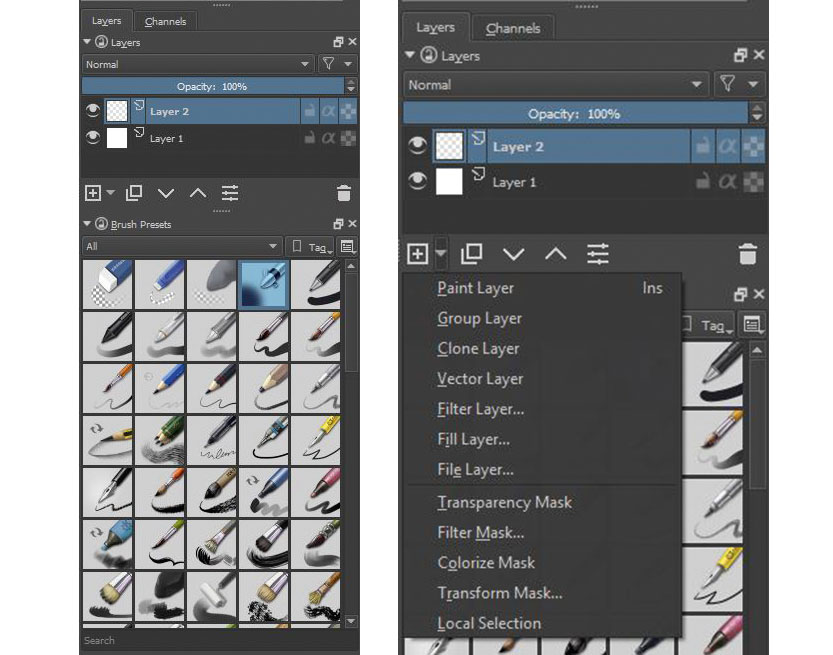
03. Get to know the right Toolbar
(Image: © Sara Tepes)
On the right-hand toolbar is the Advanced Color Selector, Layers panel, and Brush Presets. Using a colour wheel makes shifting hues easy, as well as useful for setting up complementary tones. The Layers panel enables you to create either new paint, mask, or filter layers, giving you full control of your canvas. Lastly, the Brush Presets makes it possible to quickly look through and select brushes. You can filter by types of brushes, or select your favourites for quick access.
04. Access the Brush toolbar

(Image: © Sara Tepes)
By selecting the Freehand Brush tool and clicking the Edit Brush Settings button on the top toolbar, you'll see a large variety of customisation options for your selected brush. The two features that you'll mostly be using will be the Opacity and Size filters. Make sure that Pressure is selected for either of them, depending on what kind of brush you're using, so that Krita syncs up to your tablet properly.
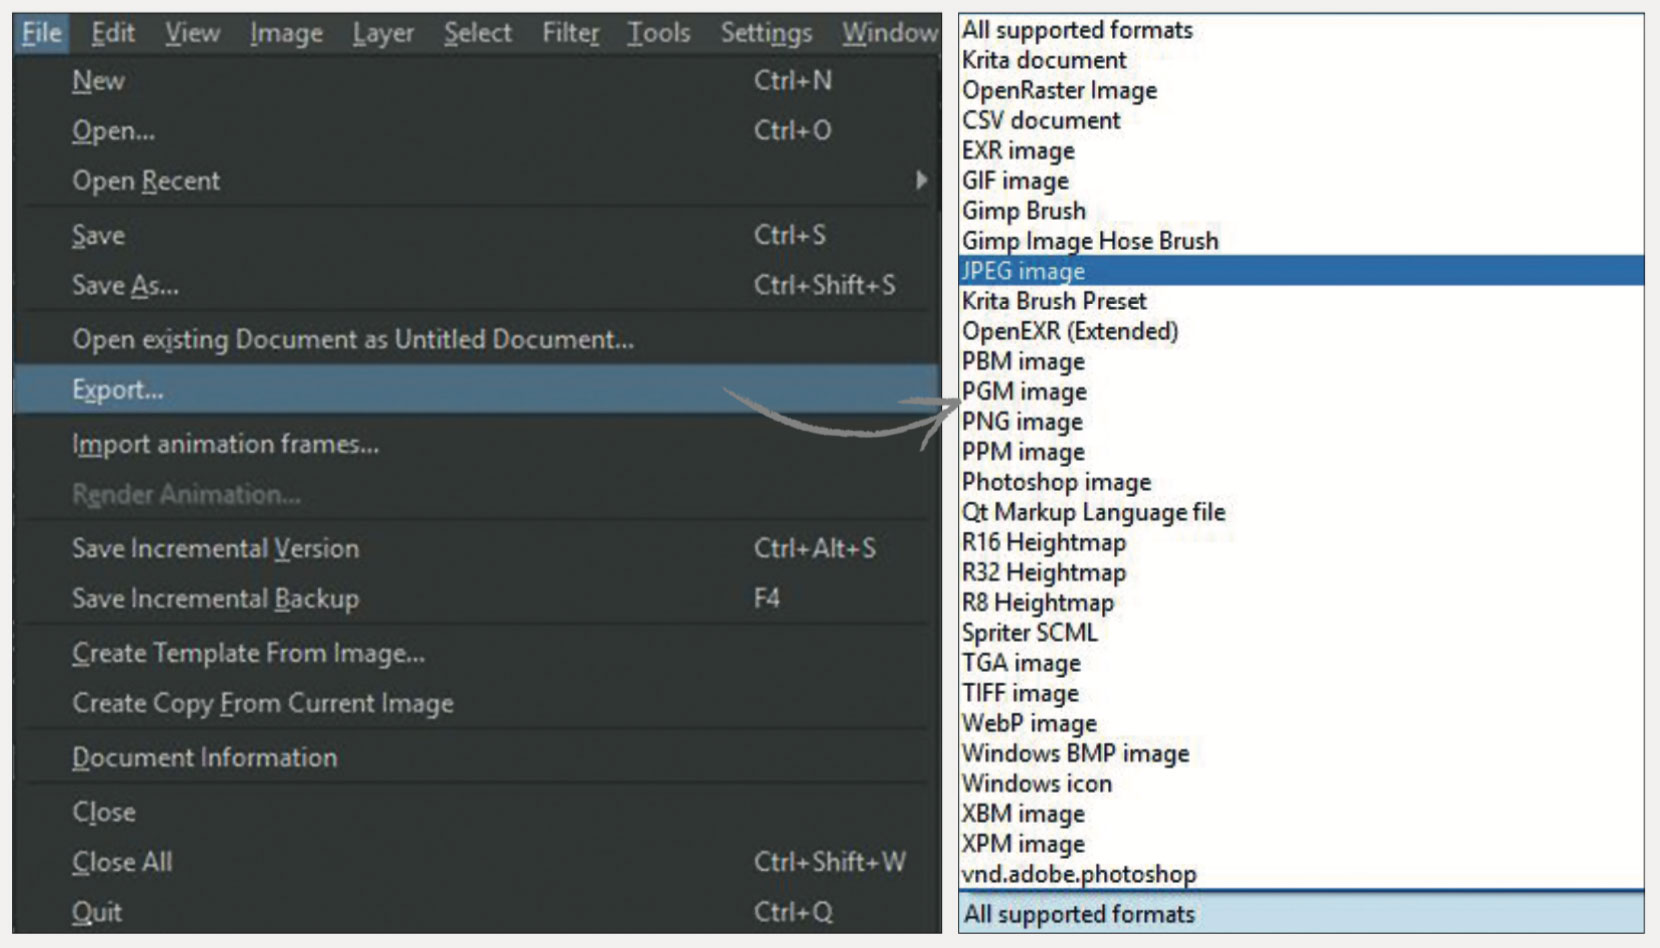
05. Save your image
(Image: © Sara Tepes)
When you're ready to save your canvas, go to File>Export and select your preferred file type. I usually stick to JPEG format unless I'm exporting a file with transparency, in which case I'll use a PNG file and make sure I have an alpha channel selected.
Next page: How to tidy up your sketches using Krita
Current page: Krita tutorial: Find your way around
Next Page Krita tutorial: Tidy your sketches
Sara is an illustrator who works with both digital and traditional mediums, and enjoys making YouTube videos teaching on various art topics.
Related articles
How to Draw Straight Line in Krita
Source: https://www.creativebloq.com/how-to/krita-tutorial
0 Response to "How to Draw Straight Line in Krita"
Mag-post ng isang Komento